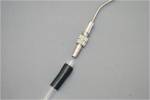
New Product for Caregivers & Parents to Perform BAHA Soundcheck

As with conventional hearing instruments, performing a general listening check on a bone anchored hearing aid (BAHA) represents an essential task for assessing whether the device may be working properly. Unfortunately, performing a quick listening check on a BAHA has not been as straightforward as performing the same task on a conventional hearing instrument.  A new product distributed by Oaktree Products in St. Louis provides a means for caregivers of BAHA patients to acoustically assess the integrity of the BAHA sound processor.

The BAHA Listener, shown at the right, is comprised of several components including a BAHA mount, a battery-operated amplifier (Crescendo 50 amplifier with two AA Alkaline batteries), and a pair of headphones. Both the BAHA mount and headphones plug into the corresponding sockets of the amplifier. All three components are housed in a metal briefcase with foam cut outs for each item. To perform a listening check on a BAHA speech processor, remove the BAHA mount out of the case and position on a flat surface.  As shown in the image to the left, attach the BAHA processor to the top of the mount.  Turn the amplifier on and listen through the headphones to determine if the sound heard via the headphones is consistent and clear. If a significant change of sound is noticed, the product packaging instructs the caregiver or parent of the BAHA user to contact their audiologist.  This product may also come in handy for audiologist to have at the clinic as an alternative tool for performing quick listening checks on BAHA sound processors.

Posted in Tools & Accessories | Tagged , , , , | 4 Comments

Better Hearing Institute is a great Resource!

For audiologists in clinical or private practice, available resources addressing various aspects of audiology are readily available and accessible via the Better Hearing Institute’s (BHI) website. The BHI is a not-for-profit corporation dedicated to educating the public about hearing loss.  They have a wonderful website that is full of valuable information on hearing loss, hearing loss treatment and preventiontinnitus, and other hearing loss resources.

Recently, the BHI developed a new section on their website specifically for hearing health care professionals on best practices.  This section hyperlinks you to several useful documents including AAA‘s Task Force document Guidelines for the Audiologic Management of Adult Hearing Impaired,  ASHA’s Guideline for Hearing Aid Fitting for Adults, as well as a hearing aid fitting checklist created by Dr. Michael Valente, Director of Adult Audiology at the Washington University School of Medicine.  To download a copy of Dr. Valente’s hearing aid fitting checklist, access the BHI’s professional tools page, scroll down to the best practices section, and then click on the link.

While perusing the BHI website, be sure to check out the numerous BHI blogs including the hearing loss blog, technology corner blog, pediatric blog, and tinnitus blog.  These same blogs appear on my blogroll located in the right hand margin of this page. Subscribing to these blogs is not only easy for audiologists, but for patients that want to stay informed. You can also follow BHI on Twitter.  Regardless of what you choose, be sure to check out the BHI website as it is a valuable resource for audiologists and patients.

Posted in Audiology | Tagged , , , , , , , | 2 Comments

How Many Audiologists Does it take to Change a Bulb?

How many audiologists does it take to change the bulb of a full-size otoscope? The answer is one experienced audiologist.  If you never had to change out a bulb, you may believe that it takes a village of audiologists just to find the precise location of the bulb since it is positioned in such a way that only the very bottom of it is visible. If you don’t know what to look for, trying to change out the bulb of your full-size otoscope will be a frustrating experience.

Unlike pocket otoscopes, all full-size otoscopes with detachable heads and handles utilize fiber optic illumination technology whereby the light from the bulb is transmitted via small fiber optic bundles. As such, the bulb will reside at the bottom of the otoscope head. Regardless of whether the otoscope head is a diagnostic, pneumatic, operating, or MacroView model, first detach the otoscope head from the handle and then turn the otoscope head over to inspect the bottom of the head. As seen in the image to the left, the bulb resides in the center of the otoscope head’s base. The bottom of the bulb is cylindrical in shape and typically has a  metal dot in the center. Using your thumb and index finger, firmly grasp or pinch the bottom of the bulb’s base and then pull hard to remove the bulb. Keep in mind that it may take several attempts to get a good enough grip to successfully pull the bulb out since most of the bulb, as shown in the image on the right, resides deeply in the bottom base of the otoscope head. Once the bulb is removed, the bottom of the otoscope head will reveal an empty cylindrical cavity.  So, if your otoscope doesn’t seem to work, after ruling out potential battery issues, the next step would involve replacing the actual bulb. For more general information, check out the free-to-view Otoscope webinar via the  Oaktree Products’ microsite at AudiologyOnline as well as previous posts about otoscopes via the Otoscope, Headlamps & Earlights section of my blog.

Posted in Otoscopes, Headlamps & Earlights | Tagged , , | 2 Comments

Suction Tube Connection Clarification

The Pro-Power Vacuum Aspirator is a suction pump designed for both cleaning debris from hearing instruments and cerumen removal from the external auditory canal. Since product packaging only includes special tools for cleaning hearing instruments, it may not be immediately evident how to set up the Pro-Power Vacuum Aspirator for cerumen removal. This post will outline the necessary steps for utilizing this suction pump specifically for cerumen removal from the external auditory canal.

As with many suction pumps, the Pro-Power Vacuum Aspirator does not come packaged with the necessary suction tube for cerumen removal.  It will be necessary to order a suction tube (i.e. Frazier suction tube) separately. There are a variety of suction tubes available; from clinical experience, a size 8 French Frazier suction tube works well for cerumen removal.

Short tubing

long tubing

Assembly of the Pro-Power Vacuum Aspirator is relatively straightforward although the packaging contents does not include the best instructions regarding assembly.  The most critical step is ensuring that the tubing packaged with the suction pump is attached correctly to the top of the suction canister. Two pieces of tubing (shown above) are packaged with the Pro-Power Vacuum Aspirator: 1) a shorter piece of tubing (5″) with a pre-attached filter and 2) a long piece (40″) of tubing.  The longer portion of the tubing with the pre-attached filter connects to the VACUUM/OUT port located on the top of the suction canister while the shorter portion of that same tubing connects to the base of the aspirator.  Next, the long piece of tubing with the clear end connects to the PATIENT/IN port located on the top of the suction canister. Finally, the Frazier suction tube, with the reamer removed, connects to the black end of the long piece of tubing.  Your are now ready to use the Pro-Power Vacuum Aspirator for cerumen removal!

Posted in Cerumen Management | Tagged , , , , | 7 Comments

Interfacing Amplified Stethoscopes with Hearing Aids: New Thoughts

The E-Scope II is an amplified stethoscope that is available in a stand-alone version (i.e. for non-hearing instrument wearers) and in several modified models specifically designed to interface with hearing instruments. The modified versions of the E-Scope II will look exactly like the stand-alone model with the exception that the earpieces of the modified version will be completely removed; in lieu of earpieces, a pair of headphones or other connection cable including a DAI, silhouette, and/or patch cord cables  may be used to interface with hearing instruments.

Beyond choosing an appropriate modified E-Scope model, audiologists must take the following into consideration for their hearing instrument wearing patients.  First, the most critical lung (breath) sounds for differential diagnosis will fall in the 200-600 Hz range; the most critical heart sounds will fall in the 70-120 Hz range. Since these are very low frequency sounds, regardless of audiometric configuration, you should provide a low-frequency emphasis program with the hearing instrument adjusted with the low frequency range set as low as possible (i.e. 100-250Hz). Second, lung and heart sounds are extremely soft sounds; in the case of patients with normal low frequency hearing, go ahead and manipulate compression ratios to 2:1 or even 3:1 in the low frequencies to see if these settings will enable your patient to better hear these soft sounds.  Finally, remember that there isn’t a one-size-fits-all solution. For more information, check out the free-to-view webinar on amplified stethoscope solutions at AudiologyOnline.

Posted in Amplified Stethoscopes | Tagged , , , , , , , , | 10 Comments

Spring forward to Otoscope Upgrades

With all your clocks moved an hour ahead and fresh batteries placed in your home smoke detectors, do a little spring cleaning at work and see if an otoscope handle upgrade makes sense.  For those of you who have been using the rechargeable Welch Allyn nickel cadmium (NiCad) handle (71000-A), upgrade to the rechargeable lithium ion (LI-ON) handle (71900) to gain the following advantages: 1) double the on-time, 2) half the weight, 3) no memory effect, and 4) low battery indicator.  Upgrading to the handle doesn’t mean you will need to re-invest in new otoscope heads; the LI-ON handle will fit any Welch Allyn or Heine full-size otoscope heads.

Don’t want to part with your rechargeable NiCad handle but could really use an otoscope head with more magnification? Check out the Welch Allyn MacroView otoscope head.  It provides twice the field of view and 30% greater magnification than traditional otoscope heads.  The design of MacroView offers the ability to adjust focus to account for variable ear canal lengths or farsighted eyes.  There is a video otoscope version of the MacroView available as well.

Finally, looking to replace your halogen bulbs with a bulb that provides a brighter, whiter light? LED replacement bulbs (03100-LED)  are currently available and will work with any Welch Allyn 3.5V otoscope head that currently takes the standard halogen bulb (03100). Check the price before you buy; LED replacement bulbs will cost significantly more than halogen bulbs but will provide superior illumination and will last for years.  Happy spring cleaning!

Posted in Otoscopes, Headlamps & Earlights | Tagged , , , | Comments Off on Spring forward to Otoscope Upgrades

Happy Birthday To You!

Since today is my birthday, I thought I would turn the tables and provide blog followers with some audiology gifts available with just a few clicks of your mouse! For those of you struggling to put together your infection control plan, contact Oaktree Products at otp@oaktreeproducts.com and ask for an electronic copy of the  Infection Control Plan Template published in my infection control books.  The template provides 95% of the information necessary for your written infection control plan. The other 5% of the necessary material requires inserting clinic-specific work practice controls or written procedures that outline how specific audiology procedures (i.e. otoscopy, drop off hearing aid services, etc) will be performed for purposes of minimizing the potential spread of disease. If you are looking for examples of work practice controls, Infection Control in the Audiology Clinic is a great resource for your library.

Not sure what amplified stethoscope options may be suitable for your patient? Take advantage of the recently updated Amplified Stethoscope flow chart created by Oaktree Products. This downloadable chart may be used to identify what products and/or product configurations may be potential options for your patient to consider based on the type of hearing instrument he or she may (or may not be) wearing.

Check out the many free-to-view webinars recorded at Oaktree Products for AudiologyOnline.  A variety of courses are available including Infection Control I, Infection Control II, Alarming Facts about Smoke Detectors, and Integrating HAT Into Your Clinical Practice. So, think of March 10th not only as my birthday, but as your second birthday! Happy Birthday To You!!!

Posted in Audiology | Tagged , , , , , , , , , | Comments Off on Happy Birthday To You!

NRR stands for “Not Really Realistic”

In the United States, hearing protection devices such as earplugs and earmuffs require a Noise Reduction Rating (NRR) to be listed directly on product packaging. The NRR is a dB value reflecting the level of attenuation a hearing protection product provides as evaluated under laboratory conditions. The higher the NRR value, the greater the attenuation.

Since the NRR is a laboratory derived numerical estimate of attenuation, the actual amount of attenuation provided by a specific hearing protector in real-life work situations will most likely not correlate with the NRR.  As outlined by the American Academy of Audiology’s position statement on preventing noise-induced occupational hearing loss, various studies have documented that labeled NRR bears little resemblance to actual NRR achieved in practice. To better estimate actual attenuation values, the National Institute of Occupational Safety and Health (NIOSH) recommended several procedures with the following formula representing the most straightforward approach:

Estimated Actual Attenuation =  dBAw – (NRR-7)/2

In the above formula, dBAw represents measured occupational noise levels of a particular occupational work setting whereas the NRR is a value taken directly from product packaging.  Assuming that a work setting’s noise levels have been measured at 90 dBA and an employee is wearing earmuffs with an NRR of 29 dB, the values are entered into the formula as follows:

Estimated Actual Attenuation =  90 dBA – (29-7)/2

The next step is to automatically subtract 7 dB from the NRR value listed on product packaging.  In the above example, it is necessary to subtract 7 dB from 29 dB which equals 22 dB. This correction factor is a safety margin to account for spectral differences in C- versus A-weighted dosimeter measurements.  Next, that derived value of 22 dB must then reduced to half or divided by 2.  This 50% reduction is another safety margin designed to account for field versus lab differences in attenuation. So, in this particular work environment, when using hearing protection labeled 29 dB NRR, the estimated actual level of attenuation is 11 dB. For more information on noise conservation, check out the library of courses offered through AudiologyOnline including Clinical Evaluation of Hearing Protectors by Tom Thunder.

Posted in Hearing Conservation | Tagged , , , , , , , | 5 Comments